PrintKit adds custom-product design builders to your storefront. Your shoppers design on your site; every order lands on your bench with a print-ready 300-DPI file, a work ticket and a one-click Production Pack. Pick your path below — the setup differs, everything after it is the same.
Shopify app
You run your store on Shopify and want the native app: builders on your product pages, orders through your own Shopify checkout, subscription billed by Shopify.
Any website
You run WooCommerce, Wix, Squarespace, BigCommerce, Webflow or plain HTML. You paste one line of code and finished designs arrive as quotes in your PrintKit portal.
On Shopify but curious about the embed? The universal embed works on Shopify too. The native app is simpler and plugs into your own checkout, so it is what we recommend — but nothing stops you using the embed instead.
Path A — the PrintKit Shopify app
Install from the Shopify App Store
Find the listing at apps.shopify.com/printkit-1 — it is called PrintKit by Big Chato's. During install Shopify asks you to approve the app's permissions and starts your 14-day free trial. You are not billed until the trial ends, and nothing else in your store changes.
Run Initial setup — brand & machines
Open the app and go to Initial setup. This is where your shop's defaults live:
- Brand — your shop name is the builder's brand baseline, and you can set a custom color palette. Left alone, each builder auto-matches your storefront theme.
- Machines & print width — whether each machine is a roll or a sheet printer, and its real width. This drives gang-sheet nesting, sticker sheet sizes and the shopper's machine chooser, so set it to your real press.
- Turnaround & rush, accepted file types and your saved-design retention — 7, 30 or 90 days, enforced by an automated purge.
Enable the builders you run
Still in Initial setup, switch on only the builders your shop actually runs. There are six — Full Color Apparel, Sticker Sheet, DTF Transfers & Gang Sheets, UV Roll & Sheet, UV Substrate, and Embroidered Apparel. Your bill follows what you enable: $19/mo for the first builder and +$12/mo each additional.
A builder only renders on your storefront once it is enabled here. If the storefront block shows empty, the builder is almost always still switched off.
Configure products & pricing
Open Builder setup and pick a builder. With point-and-click editors — no code, no design software — you set the things that make it yours. See what you set, per builder below.
Put the builder on your storefront — two ways
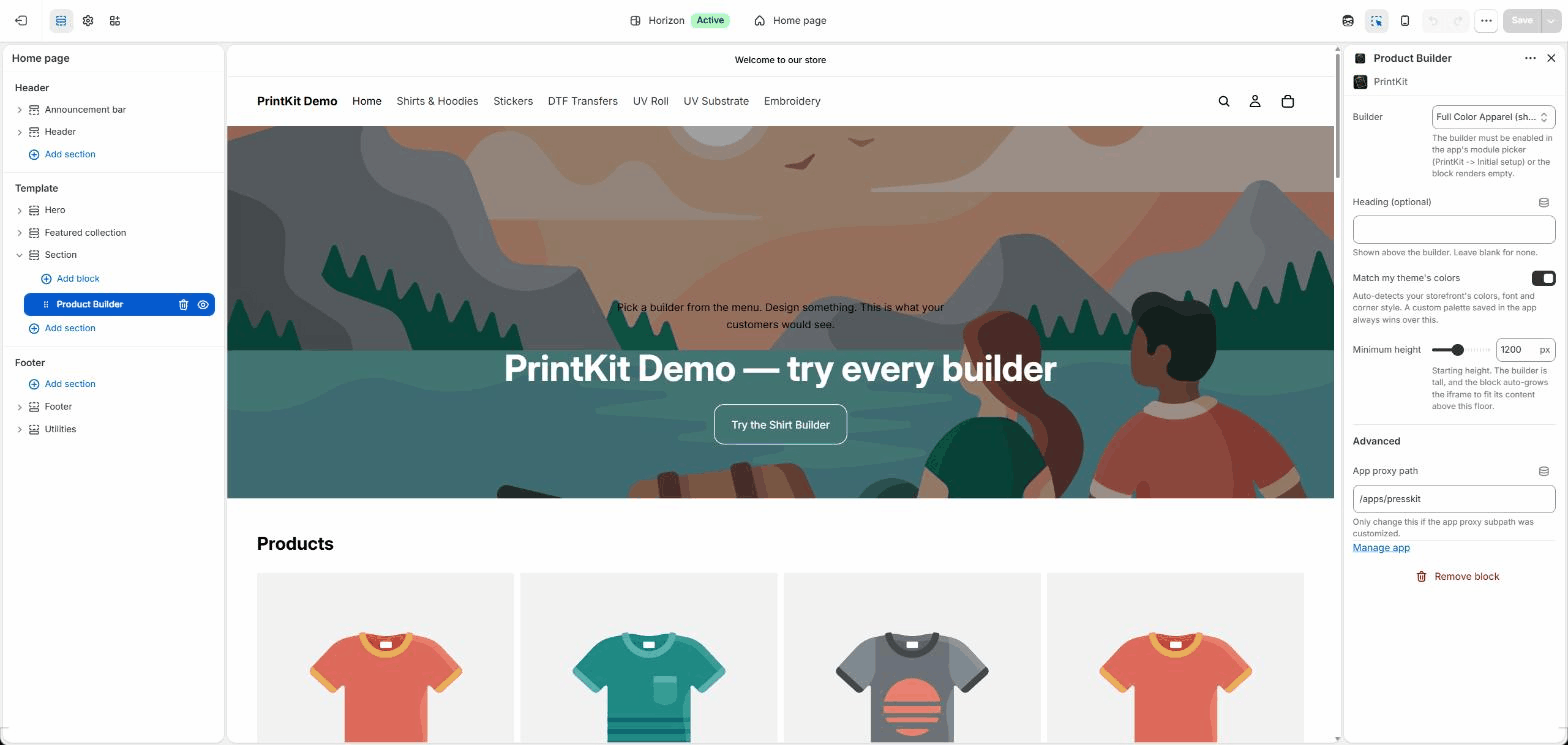
A. Theme editor block (recommended). Go to Online Store → Themes → Customize, open the product or page where you want the builder, choose Add block (or Add section) → Apps, and pick Product Builder. In the block settings choose which builder to show, set an optional heading, keep Match my theme's colors on, and Save. The builder renders in a same-origin, auto-resizing frame that matches your store.
B. Direct app-proxy link. Every enabled builder is also reachable on your own storefront domain at:
/apps/presskit/embed/<builder>
where <builder> is one of shirts, stickers,
dtf-transfers, uv-roll, uv-substrate or
embroidery. Use this to link a builder from a menu, button or custom page — for
example yourshop.com/apps/presskit/embed/stickers. It runs on your storefront domain,
so it stays same-origin with your checkout.
“presskit” in that path is intentional. It is the app's internal wire name and it has to stay put — changing it would break every live builder URL. The app itself is PrintKit everywhere you and your customers can see it.
Run a test order
Open the storefront page as a shopper would, build a quick design, watch the price update live, and check out through your normal Shopify checkout. PrintKit never touches card data — payment happens entirely inside Shopify. Once the order is paid it appears in the app under Orders.
Your app menu has a few more places worth knowing:
| Menu item | What it's for |
|---|---|
| Initial setup | Brand, machines, turnaround & rush, file types, retention, and which builders are on. |
| Builder setup | Products, colors, sizes, print areas, pricing and photos — one tab per builder. |
| Orders | Every storefront-builder order, with its work ticket, print files and Production Pack. |
| Abandoned designs | Unpaid drafts a shopper left contact info on — warm leads worth a nudge. |
| Plan & billing | Your plan, the referral program, and the Have a referral code? field. |
| Account | Your PrintKit account details. |
Path B — PrintKit on any website
Create your PrintKit account
Sign up at app.printkit.tech/signup and confirm
your email. Your 14-day free trial starts here. Referred by another shop? Sign up
through their printkit.tech/r/… link and your 25% off first month
(monthly plans) is applied automatically — on annual there is no first-month discount, but
your referrer still earns their credit — see the FAQ.
Run the setup wizard
A three-step wizard covers your shop name and brand, your machines and print widths, and your shop-wide settings. You can revisit any of it later under Config.
Turn on your builders and set your pricing
Open Config, switch on the builders your shop runs, then open each one and set your products, colors, sizes, print areas and prices. See what you set, per builder below.
Copy your one-line embed snippet
Your dashboard shows a ready-to-copy snippet carrying your own publishable key. Nothing sensitive lives in it — it is a public key, safe to paste anywhere.
<script async src="https://app.printkit.tech/embed.js"
  data-printkit-key="pk_live_your_key"
  data-builder="shirts"></script>
One tag per builder. Change data-builder to stickers,
dtf-transfers, embroidery, uv-roll or
uv-substrate to put a different builder on a different page.
Paste it onto a page
Drop the snippet into any page using your platform's HTML / embed / code block. It renders a responsive builder that resizes itself to fit, on desktop and mobile.
- WooCommerce / WordPress — a Custom HTML block.
- Wix — Add → Embed Code → Embed HTML.
- Squarespace — a Code block set to HTML.
- BigCommerce — the web page's HTML source, or Script Manager.
- Webflow — an HTML Embed element (it only runs on the published site).
- Any HTML site — straight into your page source.
Wix, Square Online and GoDaddy sandbox scripts. On those, use the iframe variant of your snippet — it's shown in your dashboard next to the one-liner — and set a height of around 1000 px.
Run a test order
Open your page as a shopper, build a design and submit it. Finished designs arrive in your portal under Orders as a quote, with the print-ready file already attached and the full spec captured. You reply with your price and collect payment the way you already do.
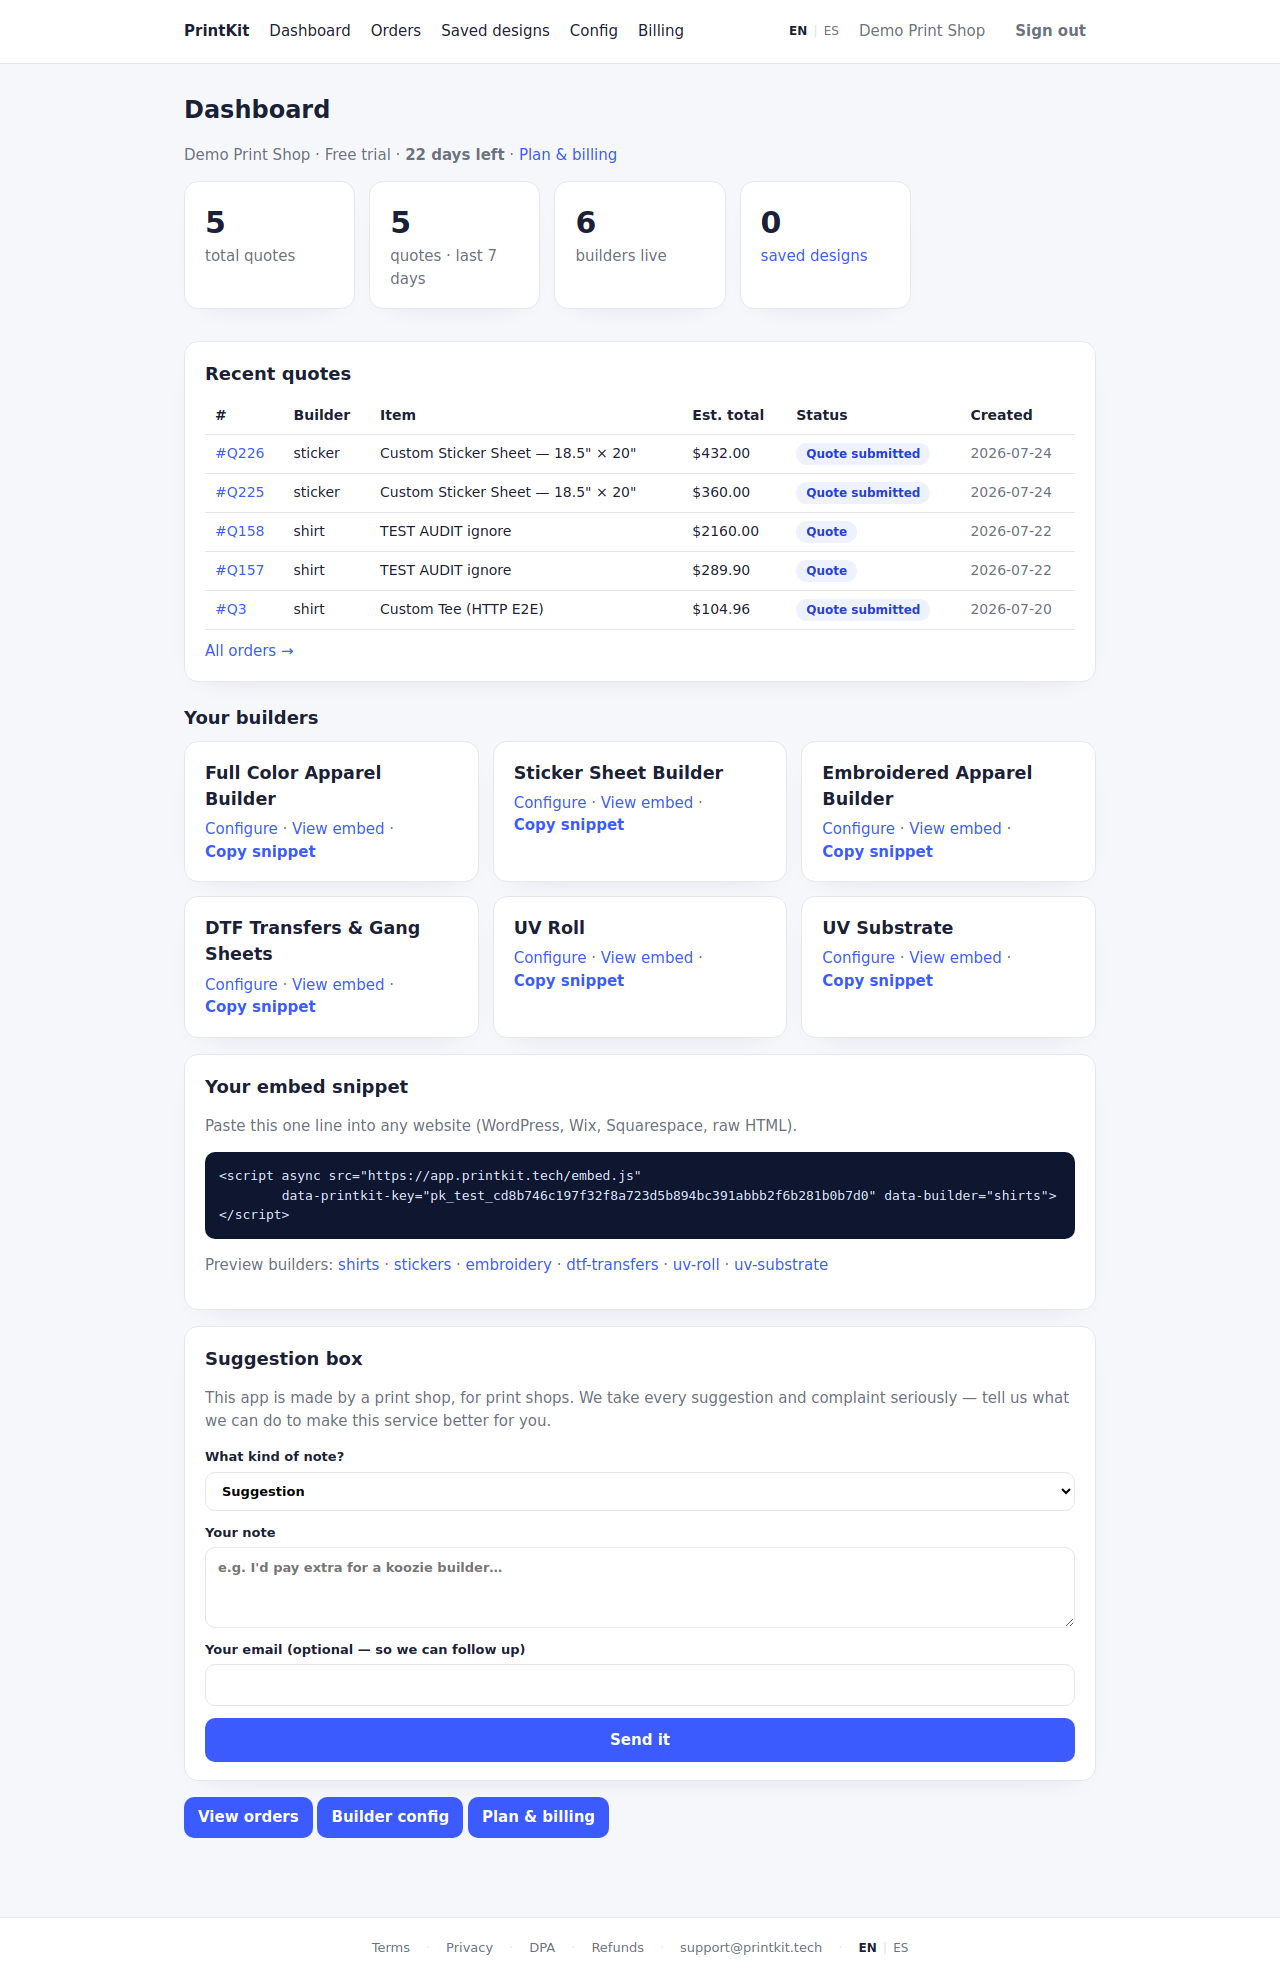
What each part of the portal is for:
| Menu item | What it's for |
|---|---|
| Dashboard | Trial and plan status, quote counts, recent quotes, your builder cards and your embed snippet. |
| Orders | Every submitted design, with its work ticket, files and Production Pack. |
| Saved designs | Customers who saved a design and left an email — warm leads worth a nudge. Links expire after your retention window. |
| Config | Which builders are on, shop-wide settings, your storefront key, and the per-builder editors. |
| Billing | Your plan and trial, monthly or annual, and your card details through Stripe. |
Install the portal as an app. The portal is a progressive web app — use your browser's “Install” or “Add to Home Screen” option and it installs as PrintKit on your phone or desktop. It still needs a connection; there is no offline order access by design.
What you set, per builder
The editors differ by builder, but the shape is the same everywhere: your products, your options, your prices. Full detail is on each builder's own page.
Whatever you save becomes the single source of truth: the storefront builder and PrintKit's server both read the same saved config, so what a shopper is shown always matches what they are charged. The builder never sends a price — only the pricing inputs — and the server has the final say.
Your first work ticket & Production Pack
Open Orders and open your test order. You'll find:
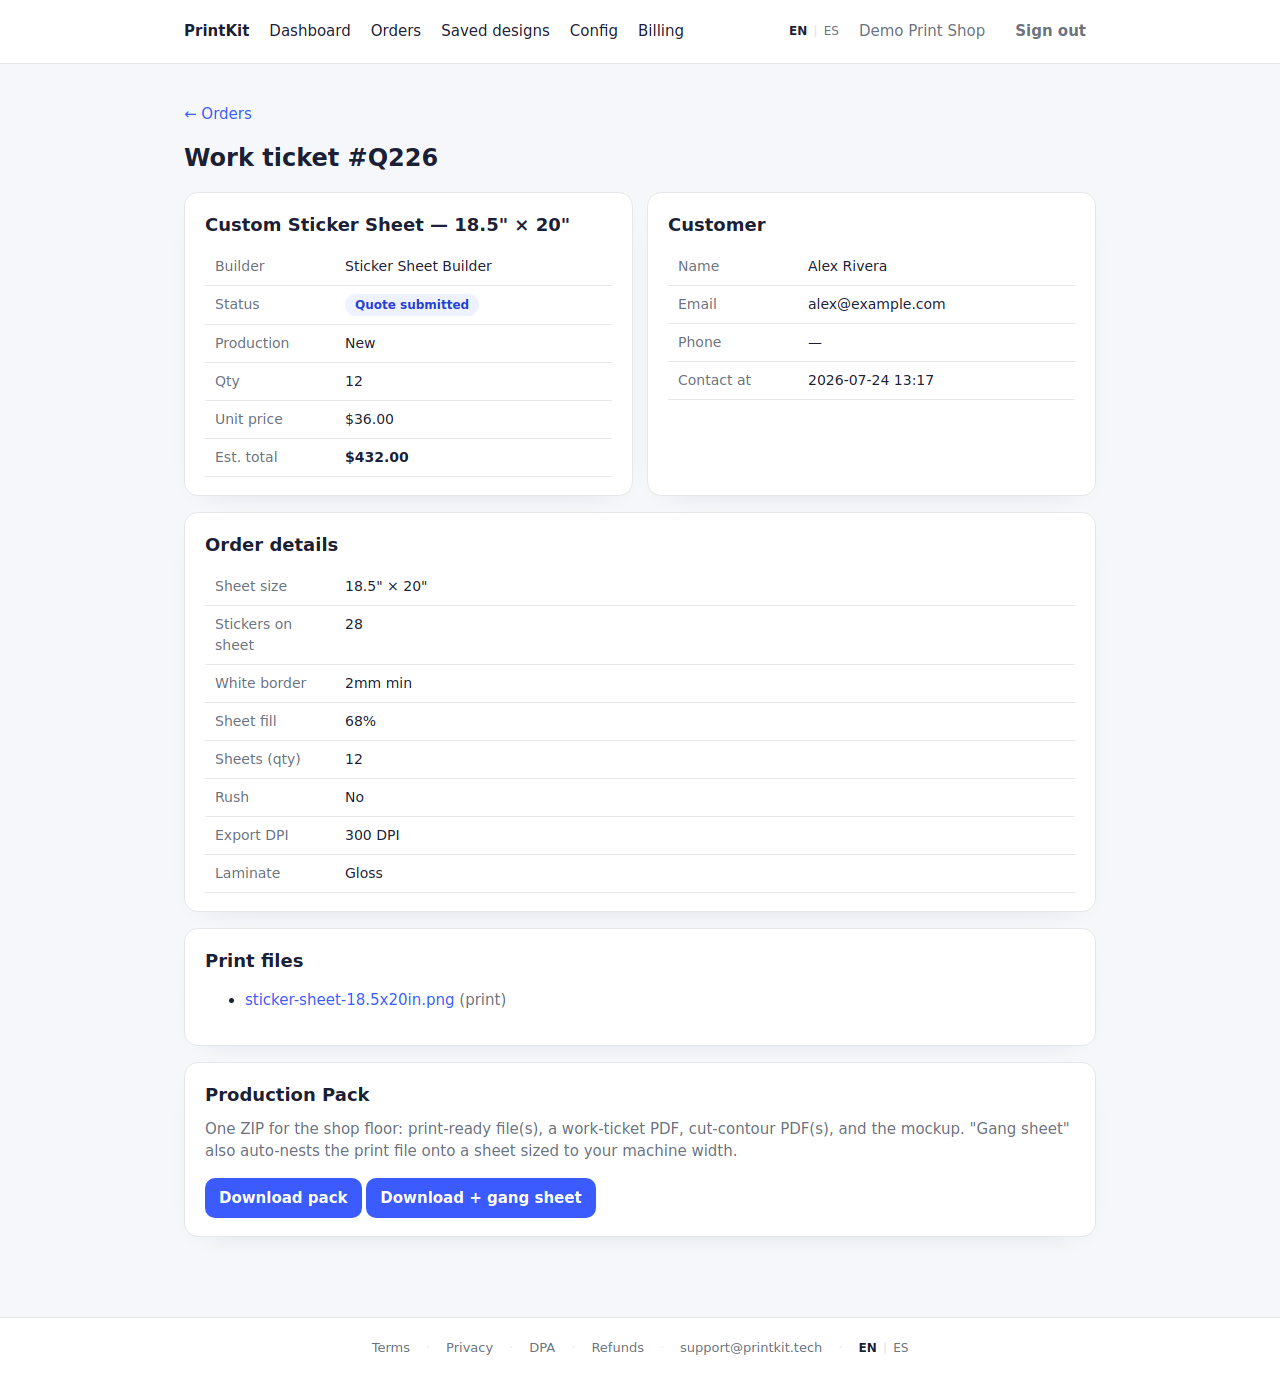
- The work ticket — order number, the builder it came from, status, quantity and totals, the customer's contact details, and every order detail that matters on the floor.
- The print file(s) — a press-sized 300-DPI file per design, plus a cut-contour PDF where the job is cut. Embroidery orders get a digitizing-ready spec sheet instead of a raster print file.
- The one-click Production Pack — one ZIP for the shop floor with the print-ready file(s), a work-ticket PDF, the cut-contour PDF(s) and the mockup. There is also a Download + gang sheet option that auto-nests the print file onto a sheet at your machine width.
Your bench can read it in Spanish. The work ticket, its PDF and the Production Pack labels have their own language setting, separate from the language you use in the admin. Set the ticket language once and every job sheet comes out in it.